Brown Butter Sponge with Praline and Hazlenuts


This is a simple sponge that with an extra step becomes something quite decadent. I used a jar of Bonne Maman Hazelnut Praline Caramel which makes it very very easy and doable but you can make your own salted caramel too – I was just all about the short cut when I saw this jar and that’s where the idea for the cake began!


You will need two cake tins – 20cm, sides buttered and bases lined. Preheat your oven to 180 (160c fan)

Ingredients

50g butter

6 eggs

200g golden caster sugar

200g plain flour

To serve:

500ml cream, whipped

Jar of Hazelnut Caramel Praline (or similar)

Chopped toasted hazelnuts

First you will make your brown butter. Melt the butter in a small saucepan over a low heat. It will melt, then foam, turning a golden colour then to a deeper amber and smelling lovely and nutty. There will be some solids in the bottom of the pan that will go a darker colour. Watch closely that they don’t go too dark. This will give your sponge a lovely complex taste and is well worth the extra step. It goes so well with the nuts and caramel. Take off the heat and leave to one side.

In a stand mixer whisk the eggs and sugar until they are pale, fluffy and have more than doubled in volume. The beater should leave a trail when you lift it out. This will take a while so have patience! Now fold the flour in carefully, trying not to knock too much air out but making sure there are no pockets of flour left in the mix (a challenge). Follow this with the cooled brown butter, drizzling it carefully in with all the nutty bits and mixing them in carefully.

Divide the mix equally between the tins and bake in the oven for 20-25 minutes (in my oven they take 23 minutes!) until golden. Cool for a few minutes in the tin then invert on a wire cooling tray to cool completely.

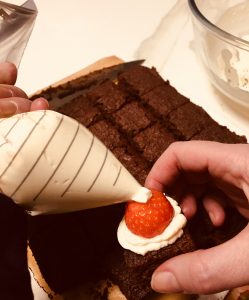
Top one half with half the whipped cream and dot with praline (you may need to warm some slightly) and sprinkle with chopped toasted hazelnuts then top with the other half and repeat.


Mini Strawberry Bakewells

These little beauties are a sort-of version of something I remember baking with my Nana when I was really tiny. She called them chelsea buns but I don’t think they were. We would bake treacle bread, buns, soda bread and cakes in her red formica kitchen and I can remember so clearly her hands deftly forming the pastry and making it look like the easiest thing in the world.

I have taken a short cut here by using a roll of ready made pastry – this means you can have these babies in the oven in about six or seven minutes flat! It’s also a handy solution to the request to bake something from the kids as they can throw it together before they lose interest in the process!

I packet of shortcrust pastry – 320g sheet works well here (there will be a bit leftover)

100g ground almonds

100g butter, softened

1 large egg

100g caster sugar

1.5 tblsp plain flour (and some extra to roll out the pastry)

1/2 tsp vanilla extract

A small handful of berries (vague but look at the pictures, you need less than 100g of berries to fill these bun tins!)

1 tblsp flaked almonds

I roll out the sheet, sprinkling a little flour to prevent sticking and stamp out 12 discs using a 9cm cutter, placing them in a good old fashioned bun tray. A handy tip – roll out the sheet using the paper underneath and a touch of flour on top, then when you cut out the discs place them upside down in the tray (flour side down) so there will be no sticking. This will make them easy to take out.

Now beat the egg, caster sugar, flour, vanilla and ground almonds together until smooth and spoon into each of the cases – don’t worry too much about smoothing it out, it will all be grand.

Add your chopped fruit of choice – I have used chopped strawberries here, but blackberries, raspberries, blueberries (no real need to shop these) or a mix of berries are all fantastic. You really don’t need that many and it’s a great use of a few lonely ones in your fridge.

Sprinkle with a few flaked almonds and bake in the oven for 20 minutes. Cool for a moment in the tray before removing carefully to a rack. They are pretty fantastic warm too. They freeze well and so can be made in advance and thawed and reheated for a few minutes in the oven to revive.

Baileys Blondies with Pecans and Coconut

So my previous Christmas post on the Santa Hat Brownies was for children (big and small alike) and this one is more for the adults, but I do confess my kids enjoy these too. These are the blonde version of the brownies. I am all for equality, me. They make a quite a few, 24 the way I cut them, and they last for a few days and even longer in the freezer well-wrapped. I think anything with Baileys in it has quite the Christmas edge!


50g pecans
25g coconut chips
225g butter
380g light brown sugar
1 tsp vanilla extract
2 large eggs
3 tblsp Baileys
300g flour
1 tsp baking powder
50g chocolate chips (I prefer plain/dark)

Preheat the oven to 160c and toast the pecans and coconut chips on a baking tray for 5 minutes, watching carefully so that the coconut doesn’t burn. Chop the pecans and set both aside for later.

Now increase the oven to 170c. Grease and line a 13×9 brownie tin with baking parchment and set aside.

Melt the butter, either in a saucepan or in a bowl in the microwave (the latter is my preference) stir in the sugar until smooth and well combined. Now add the eggs, vanilla and the Baileys, stirring to combine well.

Now add the flour and baking powder stirring well – no sneaky pockets of white!

Finally add in the coconut, pecans and chocolate.

Add to the tin, smooth over the top and bake in the oven for about 30 minutes – I start to check from about 25 – a tester in the middle should just come out clean. Usually in my oven they are done between 30-32 minutes.

Leave to cool and then cut – this is much easier when they are cool. The blondies make a tasty accompaniment to a cup of coffee or go equally well with vanilla icecream.

Santa Hat Brownies

It’s December! I can legitimately talk about some Christmas cooking and baking treats now. It’s our favourite time of year. The decorations went up yesterday, the lights in the village are being turned on later today and the Late Late Toy Show was on so the season has truly begun. We have a few favourite treats to go with the festive cheer and the first on our list are these little bites. I am a bit of a tart (!) when it comes to brownies having a favourites list of recipes stretching into double digits, but these are very cute and simple. The recipe came from a coworker of my husband’s in Toronto. He came home from work years ago raving about these little bites and was sent in with strict instructions not to return without the recipe, so thank you YuYen. She used a saucepan to make them, but I have used a bowl and a microwave with success and I have also used caster sugar here too. I gave them a festive twist with the addition of strawberries and cream, but you can also use buttercream for this too. I do like the fresh cream which works well with the sweetness of the brownies (and goodness knows there’s enough sugar floating around so for once I don’t mind eschewing it in favour of something a little more low key) The small size means they are a handy finger food dessert too.

Makes 25


170g chocolate (plain, at least 50%)

115g butter, very soft

60ml Chocolate syrup (note I use Hersheys which I have seen in Supervalu and Centra)

1tsp vanilla extract

2 eggs, beaten

75g flour

160g caster sugar

pinch of salt if you have used unsalted butter

To decorate:

25 strawberries, topped and tailed

150-200ml cream, well whipped


Preheat the oven to 175c. Butter and line an 8×8 inch tin. I like to line mine for ease of lifting them out.

Start by melting the chocolate in spurts in the microwave (if you are more comfortable melting in a saucepan, no problem!) I usually do it in bursts of 30 seconds to avoid burning, stirring each time.

Stir in the chocolate syrup, followed by the butter, beating  until well incorporated and smooth.

Now add the eggs and vanilla, mixing well.


Finally the sugar and the flour, mixing well and making sure there are no sneaky pockets of white lurking there.

Pour into the prepared tin, smoothing out and bake in the preheated oven for 30 minutes (checking before the end – mine are usually done around the 28 minute mark)

Allow to cool in the tin. These little guys are much easier to cut if you pop them in the fridge for a while (or even the freezer for five minutes) as you will get a much cleaner line. The picture below is what they will look like when you are in a rush to get to the neighbours but are running late and do not have enough time to do this, not that bad but if you are a perfectionist it may make you twitch ever so slightly.


When cool and just before serving, it’s time to decorate.

I use a Ziploc bag (or you can use a piping bag) with the corner snipped to pipe little mounds of cream on each brownie.

I then top with a strawberry and finish with a splodge  dot of cream.

You can dust with icing sugar too for that extra Christmas effect.


Cheat’s Toasted Marshmallow Ice-cream

First of all, I have to confess that if you are looking for a recipe for making your own ice-cream, you’ll be disappointed. This was a major shortcut/experiment and was an exercise merely designed to coax some summer weather gently back into our lives again! Second confession; I am not that into ice-cream! I am in the tiny minority in my family though and these little bites of summer went down a treat with the gang here!

I made the ice-cream the day before and then I went OTT (as I like to do) and made the Graham Crackers (for serving it in ice-cream sandwiches) from scratch to get the real s’mores effect. They were, I think, not worth the bother. In future, I’d either buy a nice cookie, or use any nice chocolate chip recipe which would be faster and would not require two rounds of chilling for the dough!

1 tub of Vanilla Ice-cream (I used Aldi, 900ml tub)

Few handfuls of mini marshmallows (enough to cover a shallow swiss roll tin)

1 small handful of chocolate chips

3-4 chocolate chip cookies, crumbled

Cookies, to sandwich the ice-cream, if desired


Take the ice-cream out of the freezer to soften up. You will need to be able to fold the ingredients through it. Now prep the tin that you will freeze your ice-cream in. Double line an 8×8 tin with cling film, leaving enough of an overhang at the sides.

Now, take a shallow tin and line it with non-stick foil (or foil brushed with a little oil) put the marshmallows and chocolate chips in an even layer. Preheat the grill to a medium/high setting for toasting the mashmallows. Beware! They will go from toasty to fire hazard so actually stare at them as they toast. They will be done in two minutes!

When done, fold gently into the ice-cream in a large bowl, adding two of the crumbled cookies (or more to taste) Moving quickly now, scrape it all into the prepared tin and smooth over the top sprinkling a few crumbles on top.

Freeze.

You can serve as is, with a little chocolate sauce, or as an ice-cream sandwich, using cookies or wafers.

Pavlova

This is a nod to my old pal and workmate N. If there was a birthday or a reason to celebrate, this wonder appeared. She also made all things better in our office by appearing with this at other times too. It is just delish. I love to use golden caster sugar as it makes the meringues creamy and golden looking.

A couple of pointers when making pavlova: Make sure your bowl and tools are completely clean and grease free. It may seem an obvious point but any leftover butter will spoil your meringue. Let your meringue cool in the oven too, so if you have other items on your menu, plan accordingly!  Finally, fill at the last minute if at all possible. Eat immediately – this is never usually a problem.

Ingredients

4 egg whites, at room temperature

225g caster sugar

1 tsp cornflour

1tsp white vinegar

1/2 tsp vanilla extract

Begin by drawing a 20cm circle on a piece of baking parchment and place on a cookie sheet. This will be your outline for your pavlova. Preheat your oven to 120c

If you would like to make individual nests that serve one generously, draw 4 inch circles on parchment paper – I can usually get around six out of this quantity.

Whisk the egg whites until stiff in a stand mixer (or with a handheld electric whisk) then beat in the caster sugar 1 tablespoon at a time. Follow with the vanilla extract, vinegar and cornflour.

Spoon the mix onto the circle of parchment and make a slight indentation in the middle. Bake for 1 hour until firm. If you are making the individual mini(ish) versions, they will bake at 120c for 30 minutes before you turn off the oven and let them cool. Either way, after the time, turn off the oven and let the meringue cool in the oven with the door closed  this prevents too much cracking

Here are a few ideas for fillings:

A selection of berries marinated in 2 tblsp of balsamic vinegar, 2 tsp of brown sugar and 1/2 tsp of vanilla extract. I used raspberries, cherries, blueberries and strawberries. I filled the nests with half whipped cream and half greek yoghurt and topped with the berries

Sliced mango and strawberries with basil and a teeny squeeze of lime. Again, I used equal parts greek yoghurt and whipped cream.

And my current favourite: roast apple with hazelnut and maple syrup. Inspired by a Diana Henry recipe, I roasted peeled cored apple halves sprinkled with brown sugar at 190c for 20 minutes, removing them from the oven and drizzling them with a little maple syrup and letting them cool. When cool, dice them any way you want, they don’t need to be uniform. Again fill the nests with a mix of whipped cream and greek yoghurt and a touch of maple syrup. Top with the diced apple and a little of the maple/apple juices and sprinkle with some toasted hazelnuts. Heavenly.